TL;DR
Wazuh is a free, open-source SIEM and XDR platform. A single-host deployment takes about 15 minutes with the official installation assistant, and once agents are enrolled you can write custom detection rules in /var/ossec/etc/rules/local_rules.xml using IDs between 100000 and 120000. This guide covers the full path: install, enroll, detect, tune.
Introduction
Most teams that want a SIEM stall at the same place — the licensing quote. Commercial platforms price on ingest volume, which punishes exactly the behaviour good detection engineering requires: collecting more logs, not fewer.
Wazuh removes that constraint. It is a host-based intrusion detection system that grew out of OSSEC and now ships log analysis, file integrity monitoring, vulnerability detection, configuration assessment, and active response in one open-source stack. There is no per-GB charge and no agent count limit.
This Wazuh SIEM tutorial walks through a working deployment end to end. You will install the central components on a single host, enroll a Linux agent, verify that events are flowing, and then write and test custom detection rules that fire on your own log sources — the part most beginner guides skip.
What You’ll Learn
- How the Wazuh server, indexer, and dashboard fit together
- How to install all three on one host with the installation assistant
- How to enroll and verify a Wazuh agent
- How to write custom Wazuh detection rules that survive upgrades
- How to test rules safely with
wazuh-logtestbefore restarting the manager - Which mistakes generate alert fatigue and how to avoid them
Prerequisites
| Requirement | Detail |
|---|---|
| Server OS | Ubuntu 22.04/24.04, Debian 12, RHEL 9/10, or Amazon Linux 2023 |
| Hardware | 4 GB RAM and 2 vCPU minimum for a lab; 8–16 GB RAM and 4–8 vCPU for production |
| Disk | 50 GB minimum; size for roughly 90 days of indexed alerts |
| Access | Root or sudo on the server, plus TCP 443, 1514, 1515 and 55000 reachable |
| Endpoint | At least one Linux host to enroll as an agent |
Note: A single-node install comfortably covers around 100 endpoints. Past that, split the indexer, server, and dashboard onto separate hosts and run a multi-node indexer cluster.
How Wazuh Works
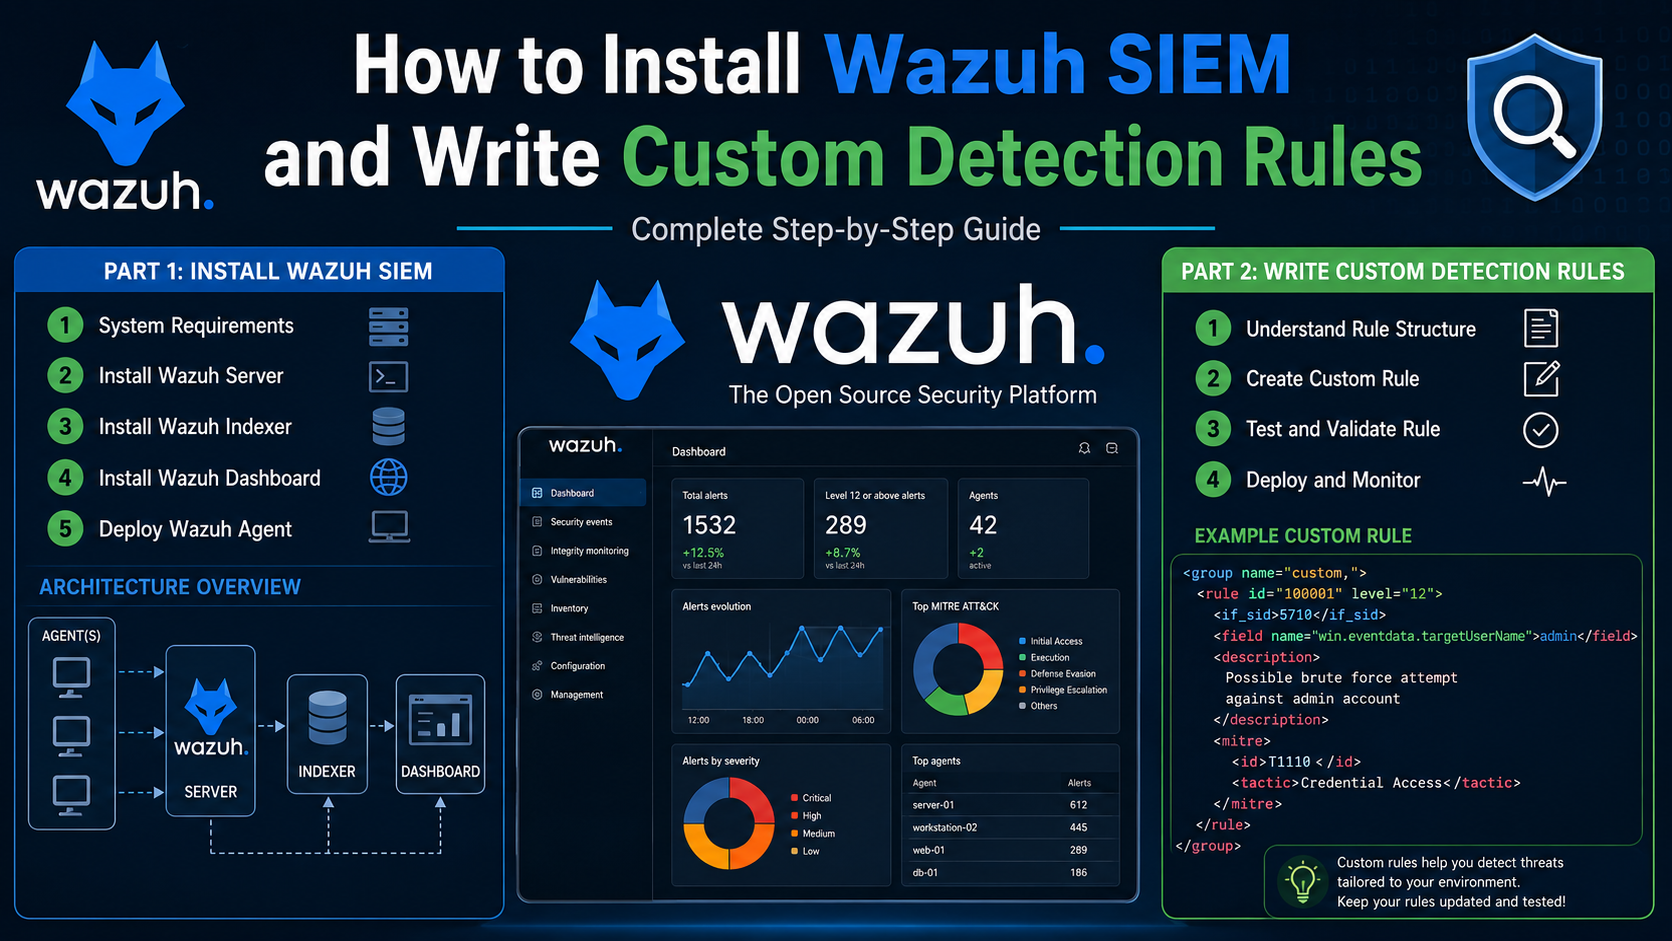
Wazuh has three central components, and understanding the split makes troubleshooting far easier later.
Wazuh agent runs on each monitored endpoint. It collects logs, watches files, inventories software, and ships events to the server over TCP 1514.
Wazuh server (manager) decodes each event into structured fields, then evaluates it against the ruleset. If a rule matches, the server generates an alert with a severity level from 0 to 16.
Wazuh indexer stores alerts in an OpenSearch-based index, and the Wazuh dashboard queries that index for the web interface on TCP 443.
The critical concept for detection engineering is the two-stage pipeline: decoders parse raw text into fields, and rules match on those fields. A rule that references a field the decoder never extracted will simply never fire — which is the most common reason a “correct-looking” custom rule stays silent.
Step 1: Install the Wazuh Central Components
As of July 2026, the current stable branch is Wazuh 4.14, with 4.14.6 released on 1 July 2026. Wazuh 5.0 is in beta and brings clustering by default and removal of the Filebeat dependency — worth tracking, but not worth deploying to production yet.
Run the installation assistant on your server:
# Download and run the all-in-one installation assistant
curl -sO https://packages.wazuh.com/4.14/wazuh-install.sh && sudo bash ./wazuh-install.sh -a
The -a flag installs the server, indexer, and dashboard on the same host and generates certificates automatically. Expect 10–20 minutes depending on bandwidth.
When it finishes, the assistant prints the dashboard URL and the admin password. Every generated credential is also stored in an archive:
# Print all generated passwords
sudo tar -O -xvf wazuh-install-files.tar wazuh-install-files/wazuh-passwords.txt
Warning: Save these credentials immediately. The archive is the only copy, and losing it means reinstalling or manually resetting the indexer security configuration.
Disable Automatic Package Updates
An unplanned apt upgrade can pull a new Wazuh version and break a working deployment. Pin the repository:
# Debian/Ubuntu - comment out the Wazuh repo after install
sudo sed -i "s/^deb /#deb /" /etc/apt/sources.list.d/wazuh.list
sudo apt update
Browse to https://<server-ip> and accept the self-signed certificate warning. Replace that certificate with one from your internal CA or Let’s Encrypt before exposing the dashboard to anything beyond a lab network.
Step 2: Enroll a Wazuh Agent
Install the agent on the endpoint you want to monitor, substituting your server address:
# Ubuntu/Debian agent install
curl -sO https://packages.wazuh.com/4.x/apt/pool/main/w/wazuh-agent/wazuh-agent_4.14.6-1_amd64.deb
sudo WAZUH_MANAGER='10.0.0.10' WAZUH_AGENT_NAME='web-01' dpkg -i ./wazuh-agent_4.14.6-1_amd64.deb

sudo systemctl daemon-reload
sudo systemctl enable --now wazuh-agent
Verify enrollment from the server:
# List enrolled agents and their connection state
sudo /var/ossec/bin/agent_control -l
An agent in Active state is shipping events. Disconnected or Never connected almost always means TCP 1514 is blocked or the manager IP in /var/ossec/etc/ossec.conf is wrong.
Step 3: Understand Where Rules Live
Two directories look interchangeable and are not.
| Path | Purpose | Survives upgrade? |
|---|---|---|
/var/ossec/ruleset/rules/ | Built-in Wazuh ruleset | No — overwritten |
/var/ossec/etc/rules/ | Your custom rules | Yes |
/var/ossec/etc/decoders/ | Your custom decoders | Yes |
/var/ossec/etc/ossec.conf | Main server configuration | Yes |
Never edit files under /var/ossec/ruleset/rules/. The next package upgrade replaces the entire directory without warning. All custom work belongs in /var/ossec/etc/rules/local_rules.xml, or in additional .xml files in that same directory once your ruleset grows past a few dozen rules.
Rule IDs 1–99999 are reserved by Wazuh. Custom rules must use IDs between 100000 and 120000. Anything below that range risks silently colliding with an official rule.
Step 4: Write Your First Custom Detection Rule
A practical example: alert when a user who is not in the sudoers file attempts to run sudo. The built-in ruleset already decodes sudo messages, so no custom decoder is needed.
Edit /var/ossec/etc/rules/local_rules.xml:
<group name="local,syslog,sudo,">

  <!-- Single unauthorized sudo attempt -->
  <rule id="100200" level="9">
    <if_sid>5400</if_sid>
    <match>user NOT in sudoers</match>
    <description>Unauthorized sudo attempt: $(srcuser) is not in the sudoers file</description>
    <mitre>
      <id>T1548.003</id>
    </mitre>
    <group>privilege_escalation,pci_dss_10.2.2,</group>
  </rule>

  <!-- Repeated attempts from the same user = likely deliberate -->
  <rule id="100201" level="12" frequency="5" timeframe="120">
    <if_matched_sid>100200</if_matched_sid>
    <same_user />
    <description>Repeated unauthorized sudo attempts by $(srcuser)</description>
    <group>privilege_escalation,</group>
  </rule>

</group>
Three things are doing the real work here:
<if_sid>chains this rule to an existing parent rule, so Wazuh only evaluates it against events already identified as sudo activity. This is far cheaper than matching every log line.<mitre>tags the alert with an ATT&CK technique, which lets you measure detection coverage in the dashboard rather than guessing at it.- Rule 100201 is a frequency rule. One failed sudo is a mistyped command; five in two minutes from the same user is a pattern worth waking someone for.
Choosing a Severity Level
| Level | Meaning | Use for |
|---|---|---|
| 0 | Logged, no alert | Suppressing known-benign noise |
| 3–7 | Low / informational | Successful logins, routine config changes |
| 8–11 | Medium | Policy violations, failed privilege escalation |
| 12–15 | High / critical | Confirmed compromise, brute force success, tampering |
Use level 0 to silence noise rather than deleting events — the event still reaches the indexer for later hunting, it just does not page anyone.
Step 5: Test Before You Restart
This is the step that separates a working SIEM from an outage. A single malformed XML tag will prevent wazuh-manager from starting at all.
Wazuh ships an interactive tester that reads the saved rule files without requiring a restart:
# Launch the interactive log tester
sudo /var/ossec/bin/wazuh-logtest
Paste a sample log line at the prompt:
Jul 24 14:22:09 web-01 sudo: jdoe : user NOT in sudoers ; TTY=pts/0 ; PWD=/home/jdoe ; USER=root ; COMMAND=/bin/bashThe tool reports three phases — pre-decoding, decoding, and rule matching. Confirm that Phase 3 shows your rule ID:
**Phase 3: Completed filtering (rules).
        id: '100200'
        level: '9'
        description: 'Unauthorized sudo attempt: jdoe is not in the sudoers file'
        groups: ['local', 'syslog', 'sudo', 'privilege_escalation']
If Phase 3 shows a different rule ID, yours is being outranked or never evaluated. If Phase 2 shows no extracted fields, the decoder is the problem, not the rule.
Only once the test passes, restart the manager:
sudo systemctl restart wazuh-manager
sudo systemctl status wazuh-manager --no-pager
Step 6: Enable File Integrity Monitoring
Detection rules are only as good as the telemetry underneath them. File integrity monitoring is the highest-value capability to turn on early. Add directories to the <syscheck> block in /var/ossec/etc/ossec.conf:
<syscheck>
  <!-- report_changes shows the actual diff; realtime alerts on write -->
  <directories check_all="yes" realtime="yes" report_changes="yes">/etc</directories>
  <directories check_all="yes" realtime="yes">/bin,/sbin,/usr/bin,/usr/sbin</directories>
  <directories check_all="yes" realtime="yes">/var/www/html</directories>

  <!-- Exclude high-churn paths to avoid alert floods -->
  <ignore>/etc/mtab</ignore>
  <ignore>/etc/random-seed</ignore>
  <ignore type="sregex">.log$|.tmp$</ignore>
</syscheck>
Restart the agent to apply. Modifications to /etc/passwd, /etc/shadow, or a web root now generate alerts with a full diff of what changed.
Common Mistakes to Avoid
Matching too broadly. A <match>failed</match> with no <if_sid> parent will fire on thousands of unrelated events. Always chain to a parent rule or a decoded field.
Skipping wazuh-logtest. Thirty seconds of testing prevents a manager that will not start.
Editing the built-in ruleset. Changes in /var/ossec/ruleset/rules/ disappear on upgrade. If you must adjust an official rule, copy it into /var/ossec/etc/rules/ and add overwrite="yes".
Alerting on everything at level 12. Severity inflation destroys the signal. If everything is critical, analysts stop reading alerts entirely.
Ignoring index growth. Alerts accumulate quickly. Configure index lifecycle management early rather than discovering a full disk during an incident.
No log retention plan. Compliance frameworks such as PCI DSS and ISO 27001 specify minimum retention periods. Decide the number before you size the disk.
Key Takeaways
- Wazuh 4.14 is the current stable branch; deploy it with
wazuh-install.sh -aand keep 5.0 on your roadmap, not in production - Custom rules belong in
/var/ossec/etc/rules/, never in/var/ossec/ruleset/rules/ - Use rule IDs 100000–120000 to avoid silent collisions with the built-in ruleset
- Chain rules with
<if_sid>for both accuracy and performance - Test every rule with
wazuh-logtestbefore restarting the manager - Tag rules with MITRE ATT&CK IDs so detection coverage becomes measurable
- Use level 0 to suppress noise rather than dropping events entirely
Detection engineering is iterative. Deploy, watch what fires for a week, then tune. A SIEM nobody trusts is worse than no SIEM at all, and trust is built by removing false positives, not by adding rules.
Further Reading
- Wazuh Quickstart Guide — official all-in-one installation reference, including hardware sizing tables.
- Wazuh Custom Rules Documentation — complete rule syntax reference and decoder chaining examples.
- Wazuh 4.x Release Notes — version-by-version changes, useful before any upgrade.
- MITRE ATT&CK Framework — technique IDs to reference in the
<mitre>block of your rules. - Wazuh Installation Assistant on GitHub — source for the install script, plus offline installation options.